miércoles, 20 de abril de 2016

Mi primera figura - My first figure

Hola amigos.

Hasta ahora no había pintado ninguna figura para mis carros. Creo que las figuras son muy importantes para ambientar correctamente las maquetas, por eso estoy pintando esta figura. Quiero dar las gracias a José María Illa que me ha dado muy buenos consejos y me ha pasado algunos enlaces muy interesantes.

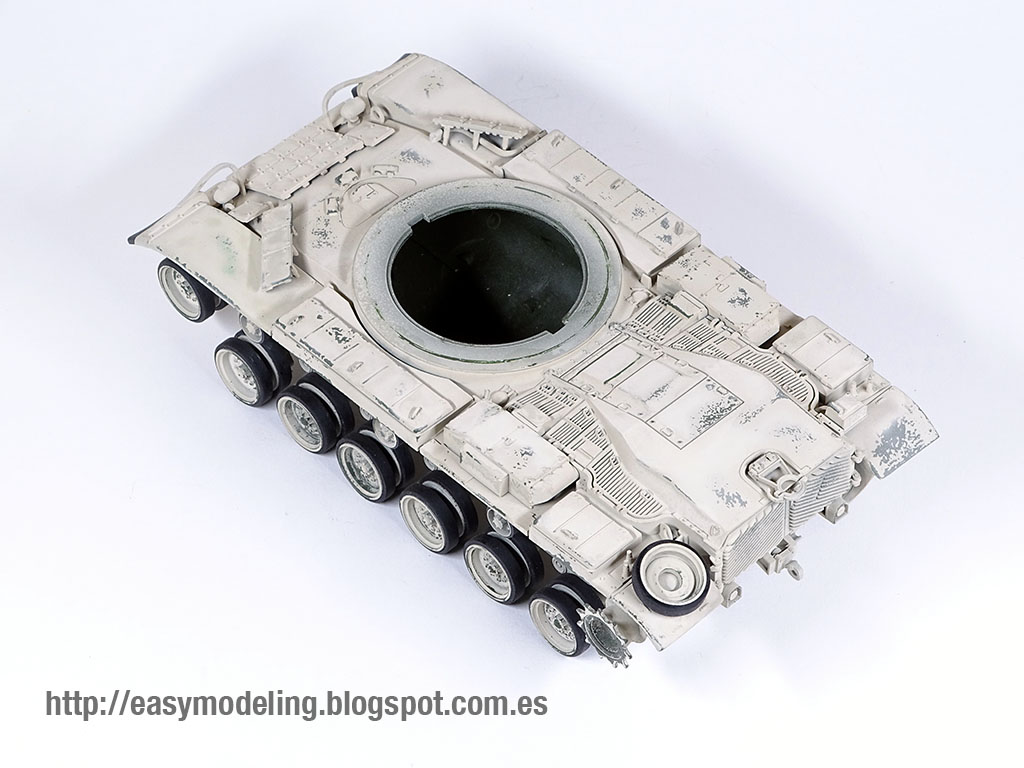
La figura es la que trae el kit de Academy, no demasiado buena, pero vale para probar. La cabeza es de hornet, muy buena en mi opinión.

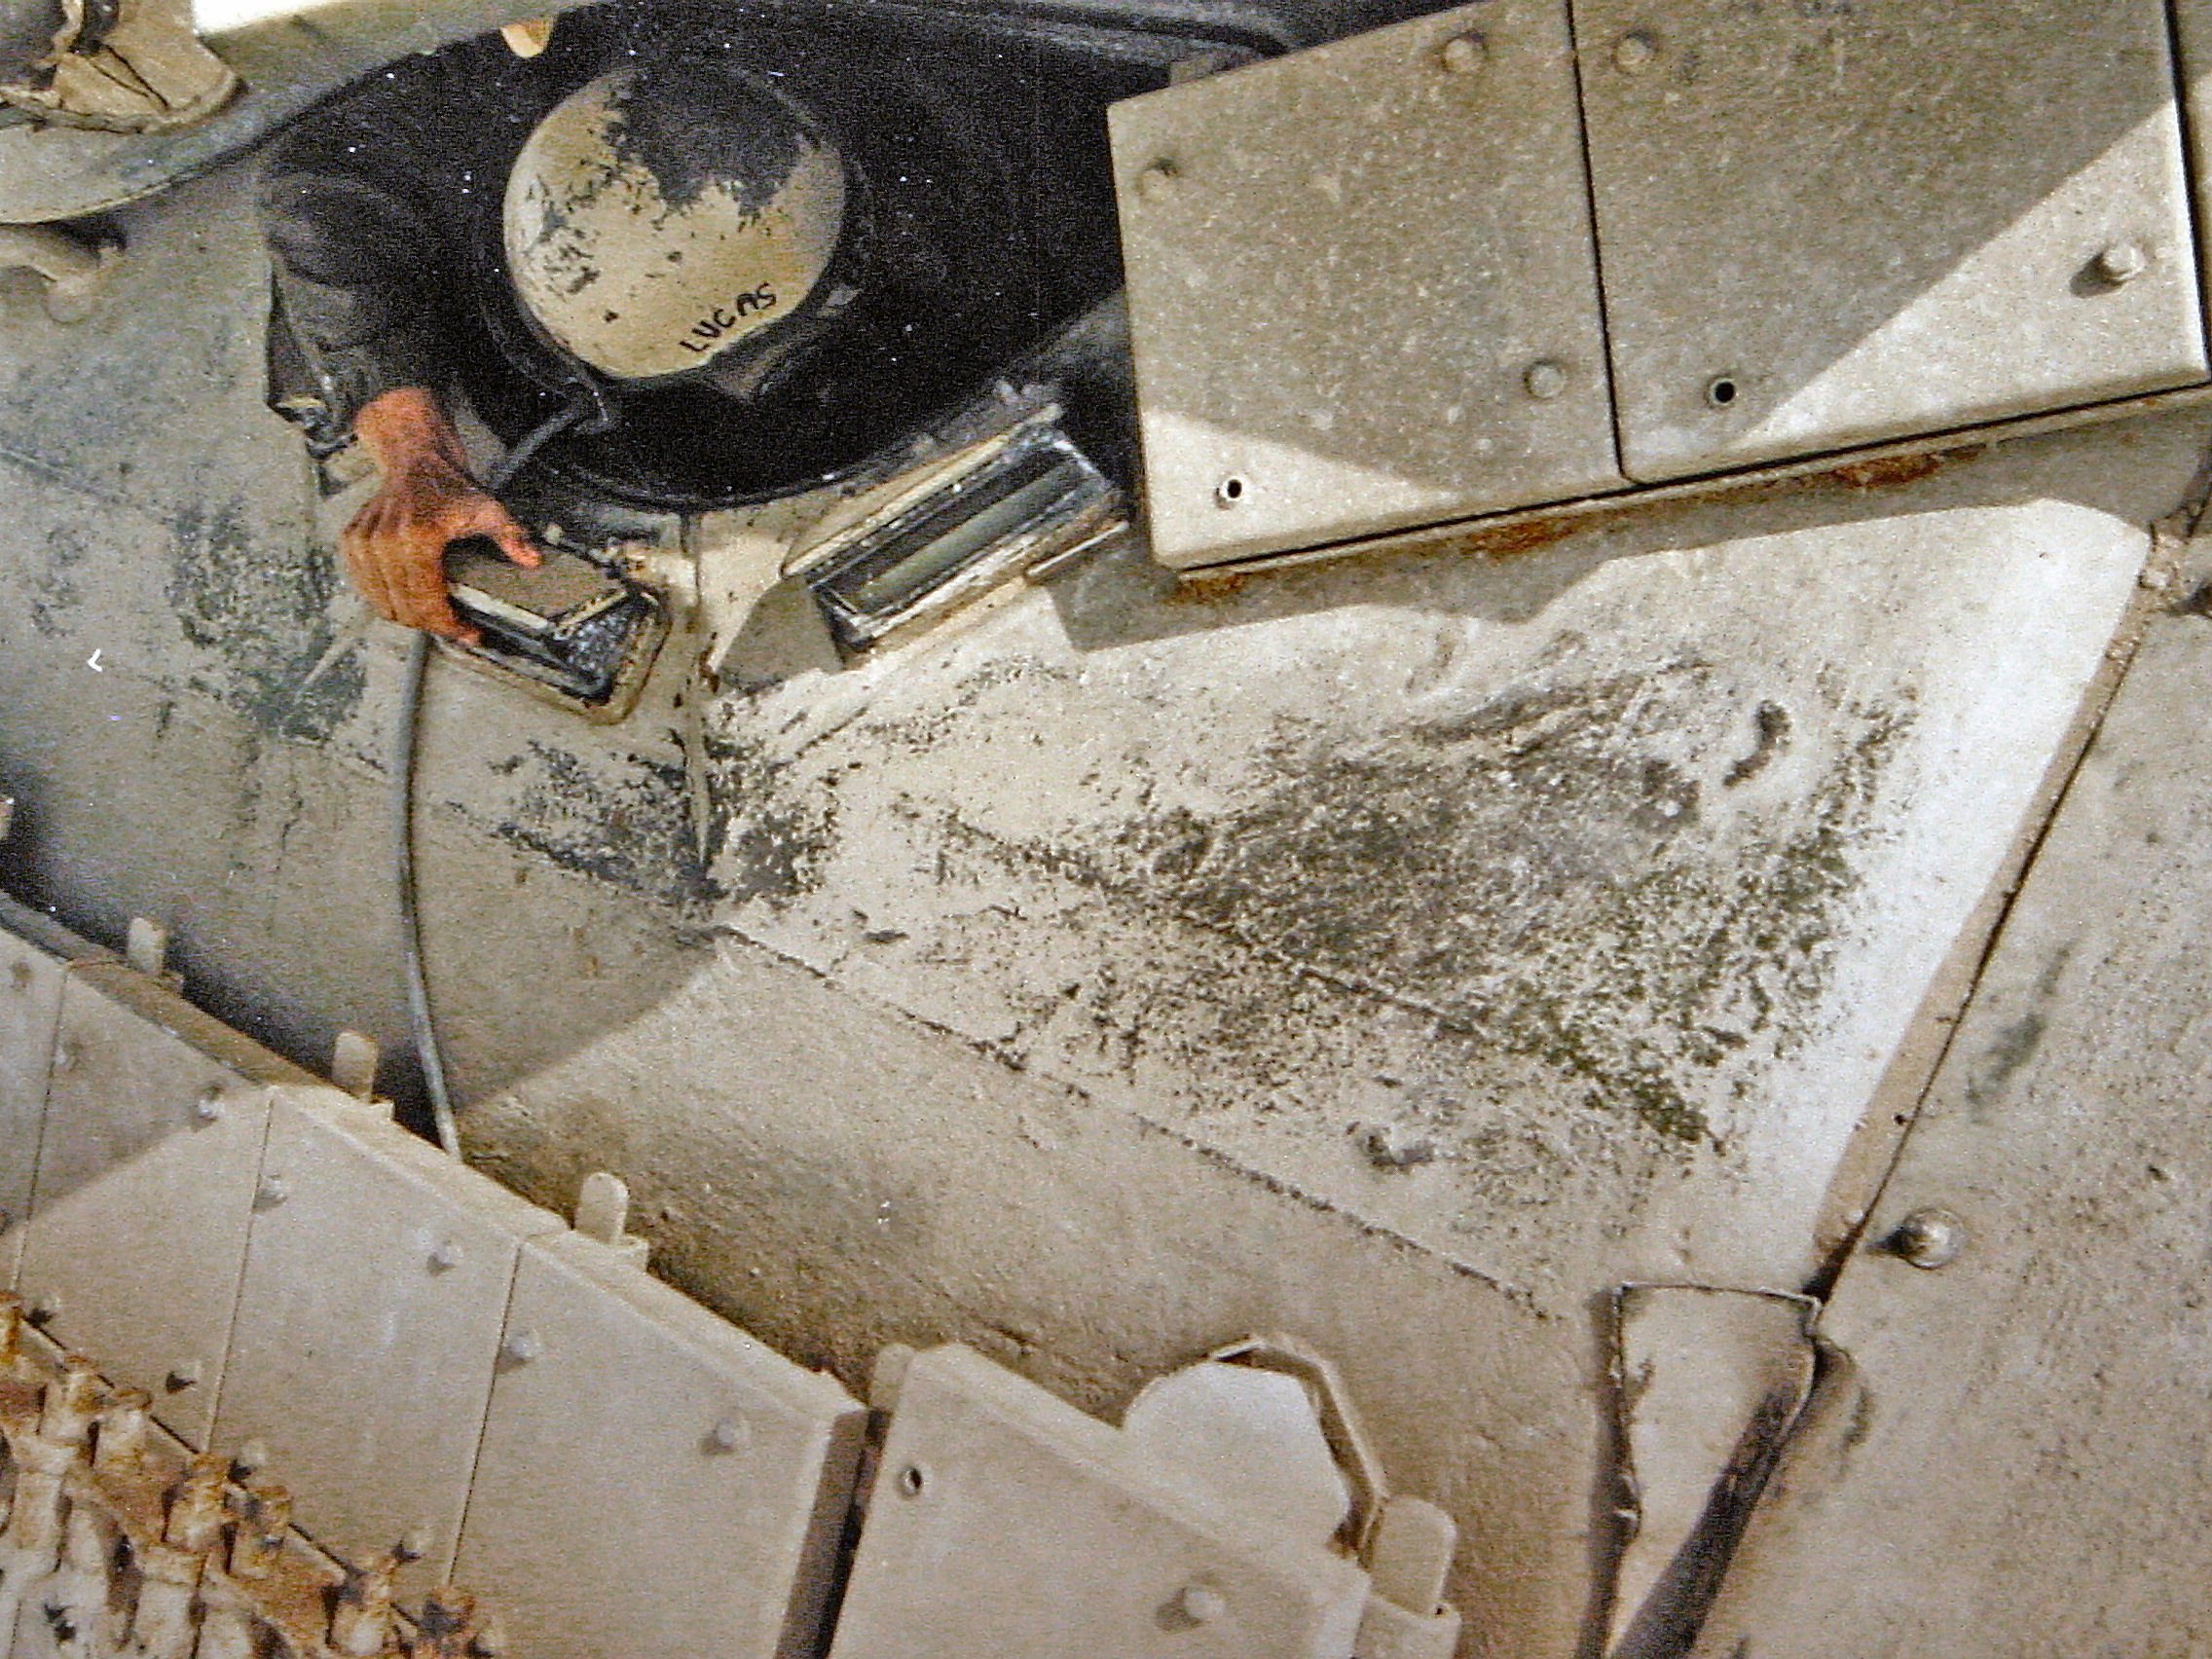
Así es como va la figura por ahora. No está terminada, falta matar los brillos, terminar el chaleco y pintar la camisa y el pantalón que no tienen ninguna luz ni sombreado.

Como siempre, cualquier comentario, consulta, crítica o sugerencia será muy bien recibido.

Un abrazo.

Fran.


Hello friends.

Until now I had never painted figures for my tanks. I believe that figures are very important in order to give realism to the models. For that reason I'm painting this figure. I want to thank José María Illa who gave me very good advice. He also gave me a few links to very interesting tutorials.

The figure is from the Academy's kit, it isn't a good figure, but it's good enough to learn. The head is from the brand Hornet, in my opinion it's very good.

This is how go the figure by now. It's not finished. It's necessary to attenuate the glitter. It's also necessary to finish the vest and the uniform.

As always, any comments, doubts, suggestions or criticism will be very well received.

Fran.


jueves, 14 de abril de 2016

Magach 6C (Gimel)

Hola amigos. Esta es la maqueta que estoy perpetrando en este momento, otro M60 (es mi carro favorito). Esta vez, se trata de un magach 6C (Gimel), una versión mejorada por las IDF del M60 A3. El Magach 6 mas común es el 6B (Bet) y el 6B Gal. Sólo he podido encontrar dos fotos claras del Magach 6C (Gimel), lo que lo hace aún más interesante para mí.

He usado como base el kit de Academy: IDF M60A1 Blazer, ref. 1358, con el cañón de aluminio de Barrel Depot: M68E1 105mm rifled gun (w/thermal shroud), BD35004, y cadenas workables de AFV Club: M60/M48 T142 Track, ref. 35010.

El kit de Academy es bastante decente, aunque he tenido que añadir algunos detalles de autoconstrucción como los amortiguadores, ya que los que proporciona el kit son bastante flojos.

Como siempre cualquier comentario, duda, consulta o sugerencia, será muy bien recibida.

Actualización: A raíz de algunos comentarios y consejos, he intentado reconstruir el sensor de viento cruzado del modelo A3. Es la primera foto. ¿Qué os parece?


Hello friends. This is the model I'm building at this time, another M60 (is my favorite tank). This time is a Magach 6C (Gimel), an IDF enhanced version of the M60 A3. The most common Magach 6 is the 6B (Bet) and 6B Gal. I could only find two fairly clear photos of 6C (Gimel), which made it even more interesting.

I have used the kit from Academy: IDF M60A1 Blazer, ref. 1358, with aluminum barrel from Barrel Depot: M68E1 105mm rifled gun (w/thermal shroud), BD35004, and the workables tracks from AFV Club: M60 / M48 Track T142, ref. 35010. 

The Academy kit is pretty good, though I had to add some details from scratch as shock absorber, since the ones provided by the kit are pretty loose.

As always, any comments, doubts, suggestions or criticism will be very well received.

Update: Following some comments and advice, I tried to reconstruct the crosswind sensor of the M60 A3. You can see it in the first picture. What do you think about it?


sábado, 9 de abril de 2016

Para los aficionados al M60 - For M60 enthusiasts

Navegando en internet he encontrado por casualidad una página llena de manuales técnicos super detallados del M60. En ellos se pueden encontrar gráficos técnicos que muestran con todo lujo de detalles los distintos componentes mecánicos del carro. Creo que es una fuente de información de incalculable valor, para aquellos de vosotros a los que os guste super detallar vuestras maquetas y que al mismo tiempo seáis aficionados al M60.

En esa página también podréis encontrar información sobre otros vehículos como el M113 o camiones.

La siguiente imagen es una muestra del nivel de detalle que podréis encontrar en los manuales.


Surfing on the net I have found by mere chance, a website full of technical manuals on the M60 tank.  I think this website is an invaluable source of information for super detailing your models of the M60. The manuals contain a lot of technical drawings showing plenty of details about the different mechanical components of the tank.

In this website, you will find information about other armored vehicles as the M113.

The following picture is an example of the level of detail of the manuals.


Espero que esta página os pueda ser de utilidad. Como siempre, cualquier comentario, crítica o sugerencia, será muy bien recibido.

I hope this website be useful for you. As always, any comment, criticism or suggestion will be very well received.


jueves, 31 de marzo de 2016

M60 A1 Guerra del Golfo (terminado) - Gulf war M60 A1 (finished)

Hola amigos.

A falta de pintar un par de figuras, así es como ha quedado este carro. En esta maqueta he añadido algunos pertrechos, como mochilas o cajas de munición, y la siempre presente bandera de EE.UU. en los carros de los marines. La bandera está confeccionada con calca virgen en la que he impreso una imagen vectorial descargada de internet.

Como siempre, cualquier comentario, sugerencia o crítica será muy bien recibido.

Hello friends.

I want to paint two figures for this model, but I think that the painting process of the tank is completed. In this model, for the first time, I've painted some equipment, as the US flag always present in the tanks of the USMC. The flag is made with virgin decal paper. I downloaded a vector image of the flag and I printed it with a normal laser printer.

As always, any comments, suggestions or criticism will be very well received.


viernes, 18 de marzo de 2016

M60 A1 Guerra del Golfo (óleos) - Gulf war M60 A1 (oils)

Hola de nuevo amigos. Otro pequeño avance en este proyecto, empolvado y envejecimiento con óleos fundidos en seco. He usado colores muy claros como el amarillo de Nápoles verde de Talens (ref. 282), Light flesh tone de 502 abteilung (ref. Abt135) o Buff de 502 abteilung (ref. Abt035).

El reto era intentar ese acabado punteado tan característico que puede verse en las fotos como la siguiente de la fantástica web Prime Portal:


Hello again friends. This is another little step in this project: weathering using oils blended without solvent. I used very light colors as Naples yellow green (Talens 282), Light flesh tone (Abt135) or Buff (Abt035).

The challenge was to try to obtain the dotted look so characteristic that can be seen in the photos of the fantastic web site Prime Portal:


Este es el resultado:

This is the result:


Como siempre, cualquier comentario, crítica o sugerencia será muy bien recibido.

As always, any comments, suggestions or criticism will be very well received.

martes, 8 de marzo de 2016

M60 A1 Guerra del Golfo (lavados) - Gulf War M60 A1 (washes)

Un pequeño avance en el M60A1 de la Guerra del Golfo. He aplicado los lavados y he pintado algunos detalles. Está listo para los óleos, que en mi opinión, son la parte más divertida del proceso de pintura.

Como siempre, cualquier comentario, sugerencia o crítica será muy bien recibido.


A small step in the M60A1 of the Gulf War. I applied washes and I painted some details. It is ready for oils, what in my opinion, are the funniest part of painting.

As always, any comments, suggestions or criticism will be very well received.


sábado, 13 de febrero de 2016

Color base desconchado... sin morir en el intento - chipped base color... and not die trying

Nota: Esto no es un tutorial sobre cómo usar la técnica de la laca para conseguir un color base desconchado. Ya existen decenas de libros, artículos y vídeos sobre ello, así que no es necesario uno mas. Entre ellos yo recomiendo el volumen 1 de la serie Tank Art de Michael Rinaldi.

En este post cuento con detalle mis experiencias usando la conocida técnica de la laca aplicada a un color base desconchado. Lo realmente interesante está al final del post, en el apartado conclusiones.
Para empezar, unas fotos del resultado.

Note: This is not a tutorial on how to use the hairspray technique to get a realistic chipped base color. There are already dozens of books, articles and videos on it, so I do not need one more. Among them I recommend Volume 1 of the Tank Art of Michael Rinaldi.

In this post I tell in detail my experiences using the well known hairspray technique applied to a chipped base color. What is really interesting is at the end of the post, in conclusions section.

First of all, some pictures of the result.


Materiales y herramientas

He usado los siguientes materiales:
  • Color base verde: Tamiya spray TS61 NATO Green.
  • Laca: Nelly normal.
  • Color camuflaje arena: Tamiya acrílico XF-55 Deck tan (1/3) + XF-78 Wooden deck tan (1/3) + XF-2 flat white (1/3), disuelto con agua destilada.
  • Disolvente: agua destilada a temperatura ambiente.

Y las siguientes herramientas:
  • Pincel redondo, mediano, de cerdas semi duras.
  • Esponja de baño sintética marca Carrefour.


Materials and tools

I used the following materials:
  • Grey Base color: Tamiya NATO Green spray TS61.
  • Hairspray: Nelly (nelly is a very cheap and common brand in Spain).
  • Sand camouflage color: Tamiya Acrylic XF-55 Deck tan (1/3) + XF-78 Wooden deck tan (1/3) + XF-2 flat white (1/3), dissolved in distilled water.
  • Thinner: distilled water at room temperature.

And the following tools:
  • Round, medium size brush, with semi-hard bristles.
  • Carrefour's synthetic bath sponge.


Proceso

He aplicado la técnica de la forma habitual:
  • Pintar el color base verde usando sprays de pintura. Dejar secar al menos 48 horas.
  • Dar dos capas finas de laca, dejando secar al tacto entre una y otra (al menos 15 minutos).
  • Pintar las distintas zonas del carro con el color arena disuelto con agua destilada. Es mejor no pintar todo el carro de una vez, sino pintar y desconchar una zona antes de pasar a la siguiente.
  • Humedecer la zona a desconchar ligeramente con agua destilada. Esperar unos segundos.
  • Frotar con las distintas herramientas para ir retirando poco a poco el color arena.

Por supuesto, este es sólo el principio. Aún hay que aplicar, filtros, lavados, etc. para conseguir un carro completamente realista.


Process

I applied the technique in the usual way:
  • Paint the green base color by using spray paint. Let it dry for at least 48 hours. 
  • Give two thin coats of hairspray, letting it dry to the touch between them (at least 15 minutes).
  • Paint the different zones of the tank with the sand color dissolved in distilled water. It is better not paint all the tank at once, but paint and chip an area before moving to the next. 
  • Wet the area to chip away slightly with distilled water. Wait a few seconds.
  • Rub with the various tools to go slowly removing the sand paint.

Of course, this is only the beginning. You still need to apply, filters, washes, and so on, for a completely realistic look.


Conclusiones
  1. El spray de pintura Tamiya deja un acabado satinado. Sobre esta superficie la laca se adhiere bien, pero no agarra, lo que hace que el proceso de desconchado de la pintura sea extremadamente sencillo. En conclusión, un factor muy importante para facilitar el proceso de desconchado es el acabado satinado del color base (que también puede conseguirse con barniz).
  2. No pintar todo el carro de una vez antes de empezar a desconchar. Es mejor proceder zona por zona. Por ejemplo, la barcaza puede procesarse en seis partes: Arriba delantera, arriba trasera, lateral izquierda, lateral derecha, frontal y trasera. De esta forma la pintura está recién aplicada (no está demasiado seca) y es más sencillo desconcharla, y sobre todo, se puede controlar mejor el tipo de desconchones que se producen.
  3. La mejor herramienta es un pincel redondo de tamaño mediano de cerdas semiduras. Se puede apretar este pincel sobre la superficie con la presión que se necesite y se pueden obtener desde desconchones grandes y marcados fig1. A (mucha presión y movimientos amplios) hasta desconchones de tamaño más pequeño y mas suaves fig1. B (poca presión y movimientos pequeños).
  4. La esponja en este caso, no es una herramienta muy eficaz. Siempre produce desconchones grandes y marcados, ya que actúa frotando lateralmente. Los movimientos verticales no funcionan, porque la pintura es más opaca que en un camuflaje invernal y no es suficiente para despegarla.
  5. Si la superficie tiene textura, esto ayuda mucho a la hora de obtener desconchones en zonas planas.
  6. En las aristas la pintura sale con muchísima facilidad, hay que tener cuidado al desconchar.
  7. Con sencillas mascarillas móviles hechas con notas post-it, se puede conseguir descascarillar un panel fig2. A, sin que las superficies adyacentes se vean afectadas.

El método de la laca permite obtener resultados muy realistas de una forma muy sencilla. Aunque como en cualquier otro método, es necesario probar y practicar mucho para dominarla completamente. Yo recomiendo probarlo con alguna maqueta montada directamente de caja, que no nos de miedo estropear.


Conclusions
  1. Tamiya spray paint leaves a satin finish. On this surface, the hairspray adheres well, but don't grabs, which makes the process of peeling of the paint be extremely simple. In conclusion, a very important factor to facilitate the chipping process is the satin finish of the base color (it can also be achieved with varnish).
  2. Do not paint the whole tank at once before you start the chipping process. It is best to proceed zone by zone. For example, the hull can be processed into six parts. Thus the freshly applied paint (not too dry) it's easier to be chipped, and above all, you can better control the type of chipping occurring.
  3. The best tool is a round, medium size brush, with semi-hard bristles. You can press the brush on the surface with the pressure that is needed. It can be obtained large and marked chipping (fig 1 A. much pressure and large movements) and it can be obtained smaller and softer chipping  (fig1 B. low pressure and small movements).
  4. The sponge in this case, is not a very effective tool. Always it produces large marked chipping. The vertical movements do not work, because the paint is more opaque than in a winter camouflage and is not sufficient to chip the paint.
  5. If the surface is textured, this helps a lot when it comes to getting chipping in flat areas.
  6. When painting the edges, the paint is chipped off too easily, you have to be careful.
  7. With simple mobile masks made with post-it notes, you can chip a panel without adjacent surfaces are affected (fig2 A).

The hairspray technique allows very realistic results very easily. Although as with any other method, you need to try and practice a lot to master it completely. I recommend you try it with any out of the box model, we don't fear to spoil.


Espero que este post pueda ser de utilidad. Como siempre cualquier comentario, crítica o sugerencia será bien recibido.

I hope this post can be useful. As always any comments, criticism or suggestion will be well received.

miércoles, 10 de febrero de 2016

M60 A1 Guerra del golfo - Gulf war M60 A1

Hola amigos.

Hace años, monté este M60A1 de la guerra del golfo. Entonces no lo pinté porque no tenía los conocimientos necesarios. Ahora creo que puedo hacerlo bien. Por ahora sólo he completado la primera etapa de la fase de pintura. La maqueta tiene el color base descascarillado y algunos detalles.

Muchas gracias por mirar. Como siempre, cualquier comentario, sugerencia o crítica será muy bien recibido.

Hello friends.

A few years ago, I built this M60A1 of the Gulf War. I did not paint it because I lacked the necessary skills. Now I think I can do well. So far I have just completed the first stage of the painting phase. The model has the hull base color and some details.

Thanks so much for looking. As always, any comments, suggestions or criticism will be very well received.


jueves, 28 de enero de 2016

Bovington's fury

Hola amigos.

En esta última entrega dedicada a referencias para el "enguarring" que tomé en el museo de carros de Bovington el pasado verano, os traigo las fotos que hice al "Fury", el easy eight protagonista de la película del mismo nombre. Lo tienen en una sección especial del museo, y han tenido el buen criterio de no limpiarlo después de rodar con él por el campo, por lo que es una fuente inagotable de ideas para la pintura de nuestros carros.

Espero que os guste.

Como siempre, cualquier comentario, opinión o sugerencia será muy bien recibido.

Hello friends.

In this latest installment dedicated to references for the weathering process that I took last summer in the Bovington tank museum. I bring you the pictures I took of the "Fury", the easy eight main character of the film of the same name. The tank is in a special section of the museum. They have had the good idea not clean it after shooting in the field, so it is an endless source of ideas to paint our tanks.

I hope you like it.

As always, any comments, opinions and suggestions will be welcomed.